Preparation:
As I am planning a trip over to the UK I needed to check out my “one bag” kit configuration and I had long wanted to activate Karwendelspitze as it is a ten pointer. In fact initially it was a 20 pointer up until the end of 2015 when it’s Austrian SOTA Summit code was removed. An action, I personally do not agree with. I believe those summit who sit on a country border should be allocated a code in each country, making them more attractive to activate for both activators and chasers. In any case many (not yet all) dual summits have been removed by the MT.
I had also considered activating this summit in winter to gain the winter bonus as well. I’m glad I didn’t as it turns out this summit is a difficult climb despite what several articles on the web say. With snow and ice around, this would be a dangerous summit to activate, for someone without mountaineering skills.
In any case, all equipment that was expected to be needed was packed into one standard rucksack. I actually find the camera bag a much more suitable bag however it only has a shoulder strap and climbing with that would be hard or even dangerous, with it rocking around.

The Location:
The Karwendel mountains are on the German/Austrian border and some (including the Western Karwendelstein) are accessed from the village of Mittenwald from the German side. Mittenwald is located on one of the main routes from Germany to Austria, the one that goes through Garmish Partenkirchen (which itself has a couple of SOTA summits in Wank and Zugspitze). The roads are not large and hence can become blocked with traffic at times but normally mid-week as this activation was, there should be no big problems.
From what I had read after you take the 10-15 minute ride up in the cable car, it’s a 20 or 25 minute walk to the summit. I’m not sure who wrote these reports however even the sign when you come out of the mountain station of the cable car, says the ascent to the summit is 45 minutes, so allow more time. I think it took me 30 minutes but I was pushing on a bit.
The Activation:
The trip down to Mittenwald was uneventful some traffic delays but nothing too bad and on the way down the morning fog slowly cleared and it turned into a nice sunny day. This was officially the first day of Autumn.
When I turned into the cable car valley station’s car park however my timing expectations dropped – there was a long queue running out of the building. As this was the first nice day for a while a lot of other people had also decided to visit the mountain, some with their dogs, large and small.
Once I found a parking spot, I went and joined the end of the queue only to find out 15 minutes later, (by which time the queue had grown even longer) that there was a separate queue to buy tickets and this was the queue to board the cable car once you had tickets. Luckily the lady behind me said she would save my place and off I went to the (thankfully shorter) ticket queue. Well surprise, surprise, a 50% price increase over the previous year AND a € 2,50 charge for the car park. This was probably financially a very good day for the cable car owners!
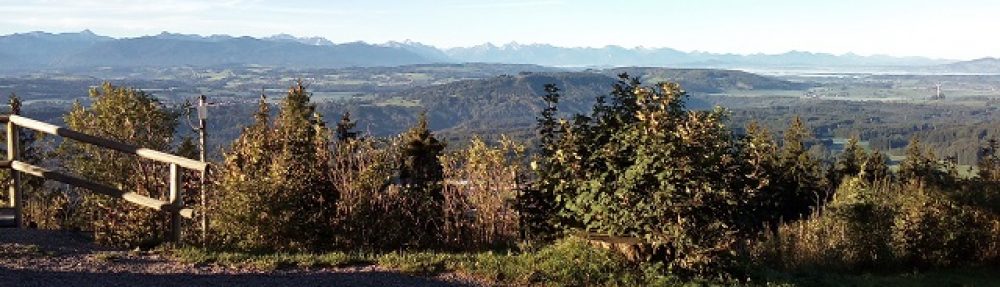
When I eventually got into the cable car, about an hour after arriving at the station, it took about 12 minutes to the mountain station with some fantastic views on the way up. Unfortunately as the car was packed as full as possible, there was no room for me to get my camera out of the bottom of my rucksack to grab some pictures. I thought I’d do so on the way back down but then I was so tired and not in a good position to see out as well as the car being packed full again.
On reaching the top station, the various options are well sign posted, so I set off straight away in the direction of the summit. The first part is an easy zig-zag walk up a track. This track is a little thin in places with steep gravel sides, so care was needed when people came the other way. Most people seemed to head up this track and then on around the mountain using the panorama way taking them back to the cable car station. At one corner of this track there were two smaller tracks one to the summit via a “kletter steig” where climbing gear would be needed and one to the summit via a longer, but not as mountainous route, which I took. This now smaller, track took me back across the face of the mountain to above the cable car station and then ziged back again as I moved up the mountain. Luckily I was the only person on this part of the track as passing here would be even more difficult than before. The last third of the climb however was over rock boulders, and up small water gullies that needed some sure footed work. I had put my hiking boots on at the car. At this point I wished I had my normal sports shoes on as they would have given me some more feeling when the stones were lose, which some were. This climb, now literally on the side of the rock face had a metal cable to hold onto to help with climbing. This is great until someone is coming down and you need to find a small spot to balance on without the rope, to let them pass (I had 6 kilos of gear, food and water on my back at this time). This climb seemed to go on and on and get steeper and steeper. I eventually saw the summit which was good as I was about to consider the climb too hard and turn around. Seeing the summit I decided that since I had got this far, I would manage the last part as well, and then worry later about how I would get down.
Despite the difficulty of the climb (to my standards) there were plenty of people already at the summit and while I was there many more (some with their dogs!) arrived as well, so I knew I could not set-up on the summit itself but about 10 metres below the summit there is, off to the side, what I call a small picnic area of about 6 square metres. Enough room to put out a blanket and several people could enjoy a picnic without being to dangerously close to the edge of the about 1000 metre sheer drops. So that is where I decided to set up. I crawled under the guide rope and put my rucksack down and stopped for a rest and a drink of water.
Unfortunately there was no easy way to support my fibreglass mast and I ended up leaning it against some rocks which sort of formed a wall between the path up the mountain and my “picnic area”. I found a large stone and leant it and my rucksack against the bottom of my mast. This was not very stable and so I could only extend the mast to about 2.5 metres high. On top of the mast I put my SOTABeams linked dipole and only rolled this out to just past the 20 metre links, tieing the next sections of antenna wire around some rocks at each side of the “picnic area”. Those rocks were as close as I wanted to get to the edge! Note to others planning to activate this summit – if you have a tripod supported antenna – that would be a better choice. So the antenna was somewhat compromised to say the least! I had brought my small amplifier with me, so I connected that up with the FT-817 to the antenna. Output power on 20 metres would have been around 20 watts. I was now over an hour late on my alerted activation time (but I had been spotting updates as the various delays occurred) and was wondering whether after all the effort, I would manage 4 contacts to get my 10 activator points for the summit. While with a better antenna set-up I am sure I would have had far more contacts, I was very happy with the eight which I got.
Karl M3FEH from the UK was first in the log, followed by calls from Belarus, the UK, Greece, the UK, Spain, Portugal and finally Central Norway. (Log is shown below). All of these contacts came in within 15 minutes of starting up. After that I tried for a further 5 minutes without any additional contacts so I decided to pack up and face the trip back down the mountain before it got any busier or hotter (and before I could think about it any more).
I am happy to report that I managed the trip down the mountain face, despite the highly polished stones caused by people sliding down on their bottoms – something that I reverted to on a couple of occasions as well. I got back to the cable car station just as my legs started to feel like rubber. I’m sure knowing now what I do about this summit, the next time I activate it, I will have less problems but it has taught me once more not to believe what hikers report as being an easy summit to always be so.
Things could have been very different if it had been a rainy day – I would not have even tried the climb to the summit, so (for me at least) this is a “fair weather summit”.
Photos:
Equipment:
Yaesu FT817ND.
Modified Ramsey power amplifier.
SOTABeams Linked dipole
Thick plastic painters sheet
Log:

Conclusions:
The equipment worked well considering the compromised antenna. If I had known the situation with the space available, I probably would have taken my tripod mounted vertical antenna instead of the dipole however. I’m sure using the amplifier helped get over some of the disadvantage however it was also extra weight to carry, which would have perhaps been better avoided.
73 ’til the next Summit!

You must be logged in to post a comment.