Preparation:
As I am planning a trip over to the UK and I also want to activate some German summits where space is limited and some walking distance is required, I have been trying to sort out a simplified kit to take. The first thing that I removed from my usual 10Kg+ two bags set-up was my Ramsey Amplifier. While I know the 25w on 40m or 15w on 20m does make a difference compared to the basic 5w from the FT-817, the extra size and weight of the amplifier, its cables and the two 5000 maH LIPO batteries with a battery booster unit (to take the 11v from the LIPOs up to 13.8v), simply can’t be justified in a basic kit. The next issue was the antenna. I have a linked, Inverted-V dipole from SOTABeams and an OCF from Aerial-51 (Spiderbeam) I usually pack both of these and the Aerial-51 with its 4:1 balun does account for some weight and size, as does either the 6m or 10m “Squid-pole” (telescopic fibre-glass pole) that I need to support them.
So if I take the FT-817 with an internal 2500 maH LIPO battery and a spare 2500 maH LIPO, what do I run this into for an aerial? Some time ago I bought a Diamond RHM-8B loaded vertical whip which is designed to fit directly onto the BNC socket on the FT-817. Apart from the fact that using this puts stress on the FT-817 front panel, it also doesn’t radiate very well (receive is fine). About 6 months ago I looked at moving the antenna from the rig to a camera tripod (even though Diamond say not to do this). I bought a second-hand HAMA camera tripod which is strong but also light and folds down to a small size. To this I added an SO-239 base and coax cable. With the help of a BNC to PL-259 adapter, the diamond sits on top of the tripod. Early tests showed this worked and worked better with a random length of wire acting as a counterpoise radial. It had the problem however that the tuning on the slide-able coil under the telescopic antenna (the type that we used to see on transistor radios) was now very compressed at one end of the range and very difficult to get the SWR down.
The latest modifications have been to add a horizontal extension wire to the top of the telescopic whip (one of two lengths, one for 40m and one for 20m and above) and to add 4 not just one wire as a counterpoise. These wires being of different lengths. One would expect that these wire must be spread out in different directions not to affect each other, however I have found that leaving the wires wound together in one direction works equally as well. Initially I used the teflon strengthened antenna wire but this proved to be too heavy, tipping the antenna over, so I replaced this wire with very thin and light PCB hook-up wire (AWG 28 if I remember correctly).
Last weekend, I put this antenna together INSIDE the house to just see how well it works on receive compared to my external wire antenna (a 40m loop). I was amazed to find that OH0Z (on an island between Sweden and Finland) was booming in at S9+ on both antennas, so I gave him a call from the 5w, internal antenna, set-up and he actually came straight back to me! He gave me a 5-9 report, however as he was in a contest he would give everyone a 5-9 report and I didn’t want to delay him by asking for a real signal report. The key point was he copied my complete over without asking for anything to be repeated, so the antenna was working!
Now time for a test – to see if the antenna would work as well from a summit and to see if I had removed too much from the pack. Here are the contents and the small rucksack that it all packs into and weighs under 6 kilos.
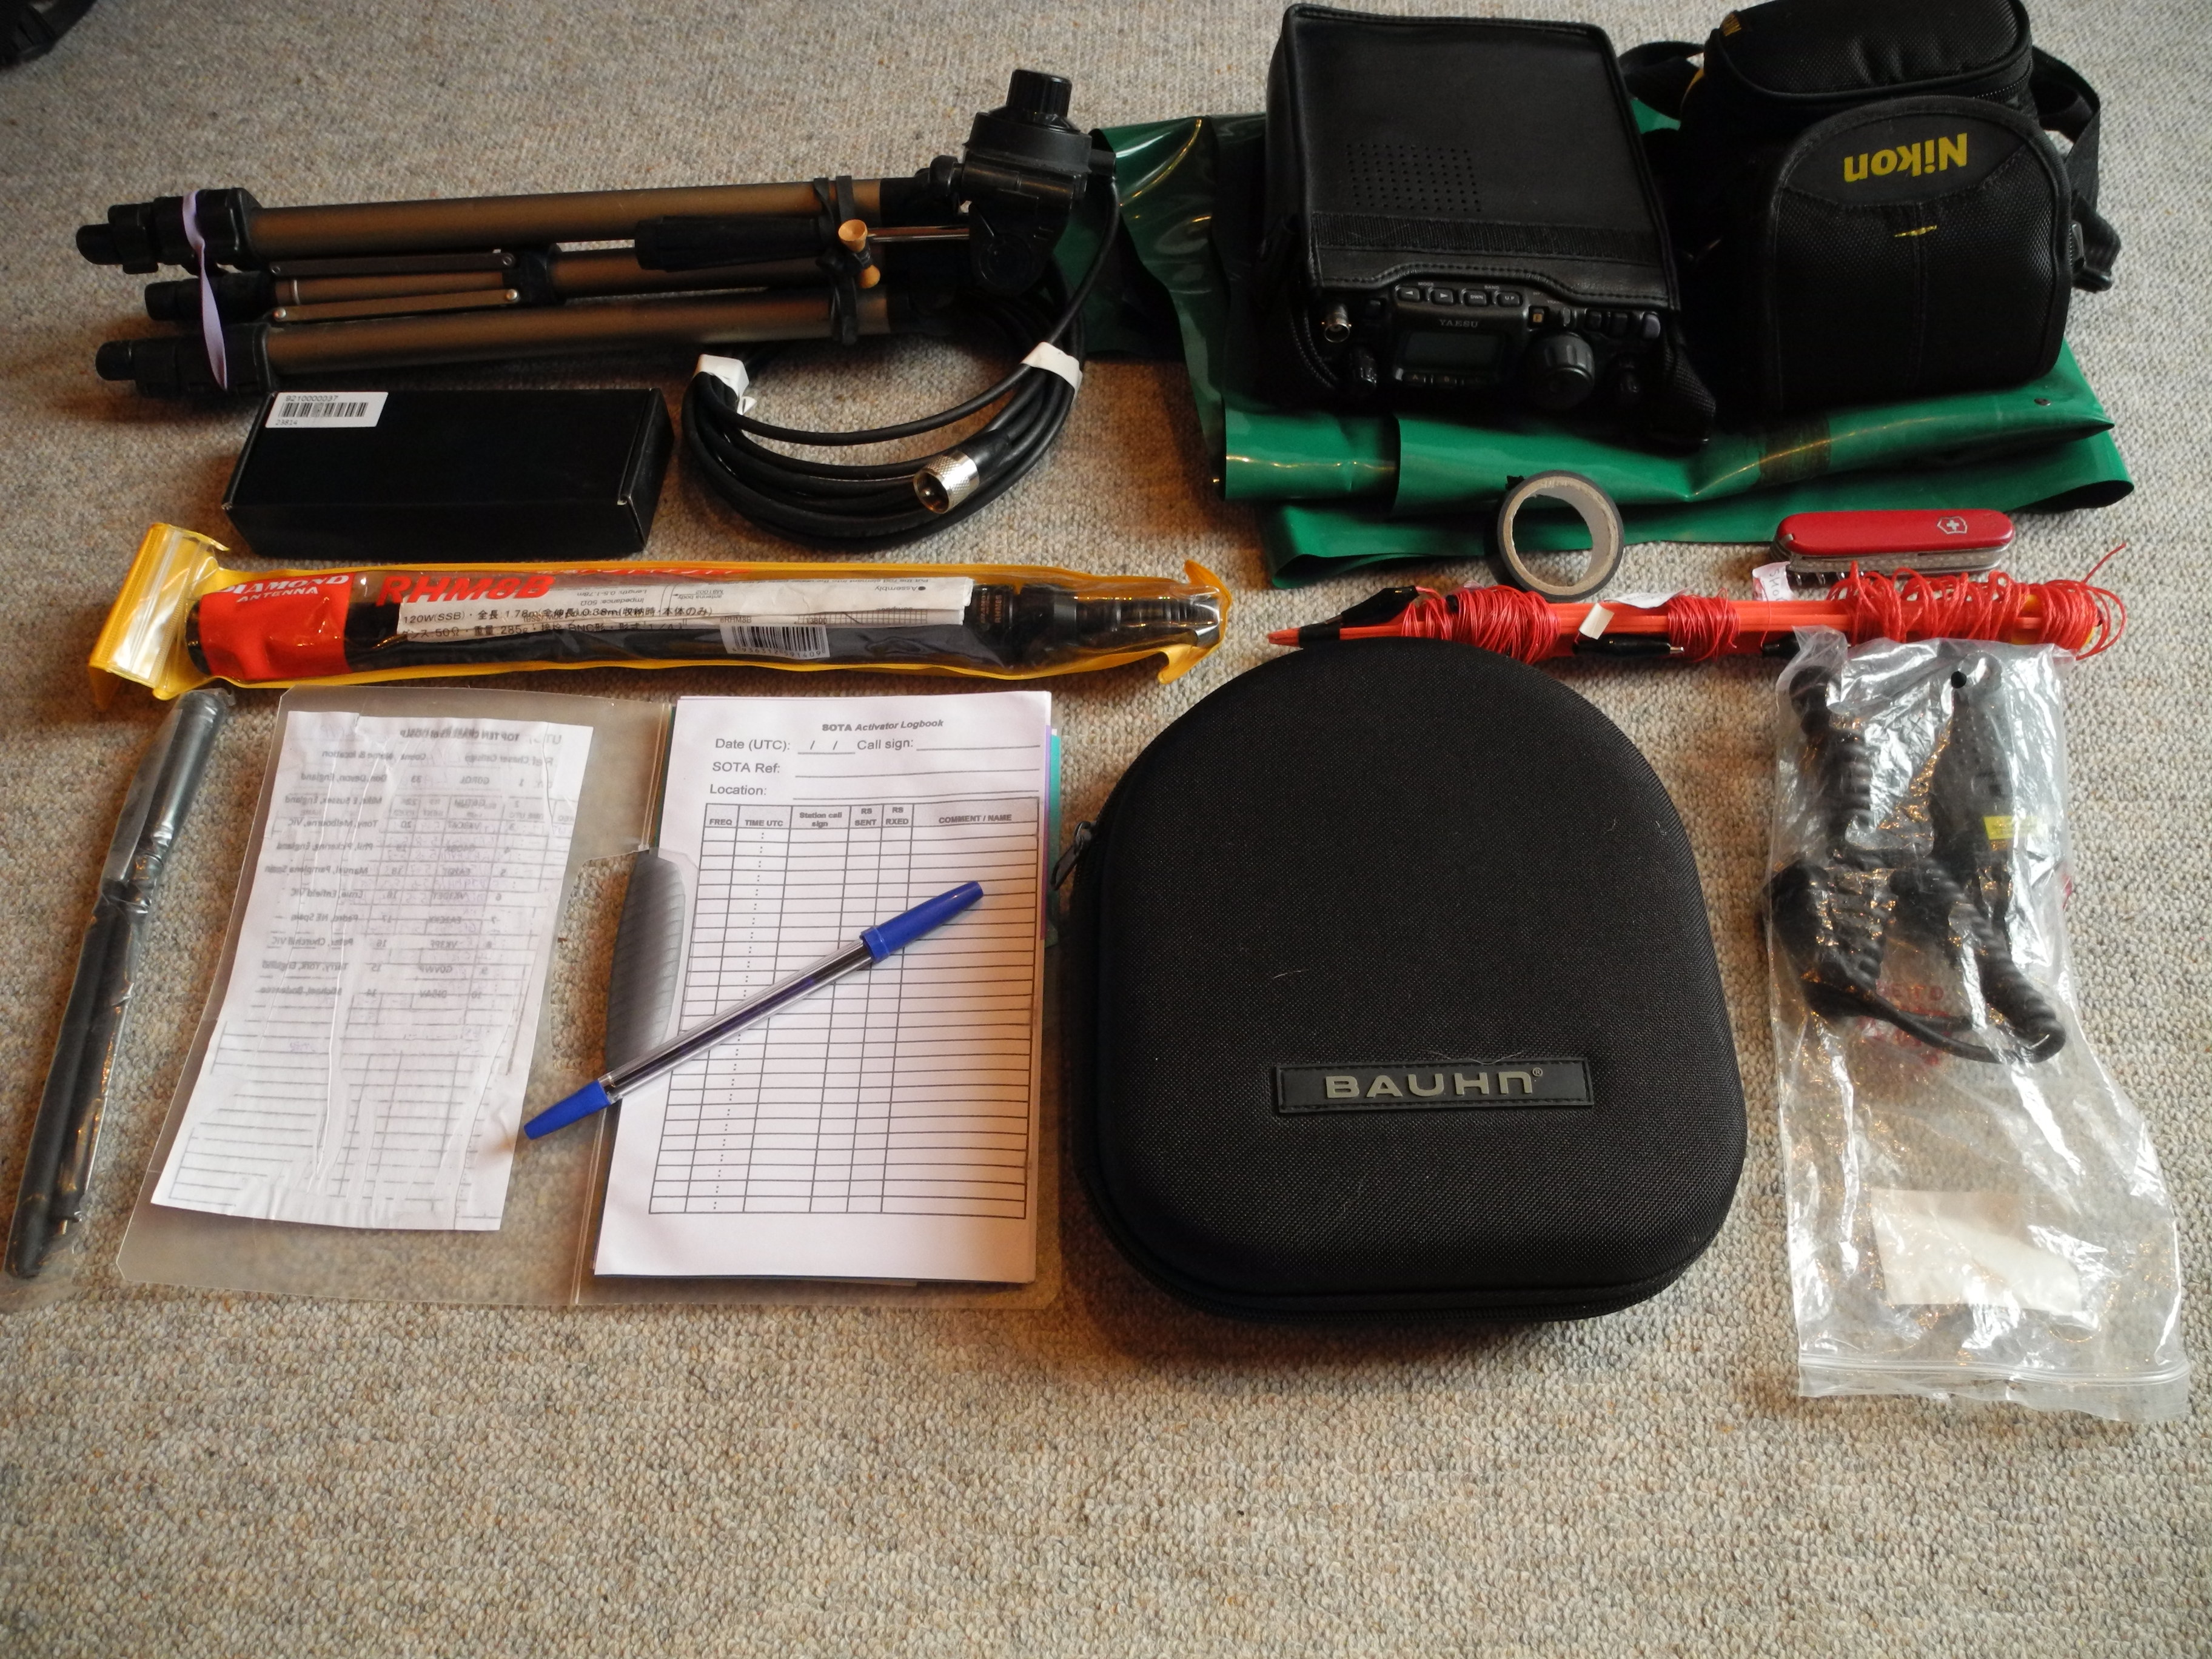
Top row left to right: Tripod with SO239 mount, spare 2500 maH battery below it, FT-817 and Nikon camera sitting on top of painters sheet (thick plastic).
Middle row, left to right: Diamond RHM-8B antenna, Plastic stake with radial and extension wires wound on it (PVC tape and penknife above it).
Bottom row, left to right: FT-817 6m, 2m & 70cm rubber-duck antennas, Log book and pen, Headphones, FT817-microphone.

The Location:
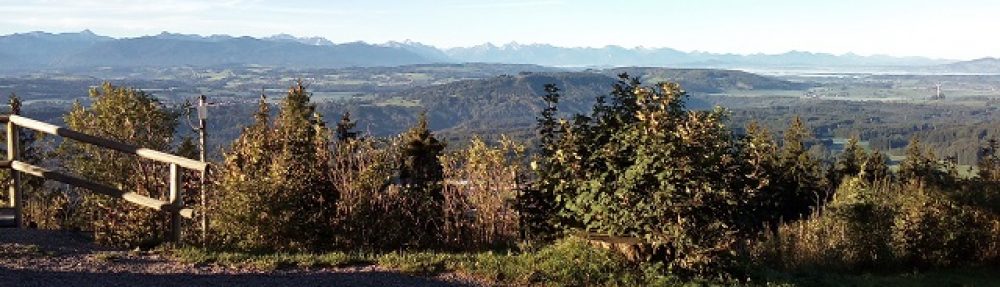
Laber is a very easy access site with one of the oldest gondola lifts still working taking you right to the summit (and a restaurant of course). The mountain overlooks the village of Oberammergau where the famous religious play happens every ten years. The last time I activated Laber in 2014 I got soaking wet and the views were often blocked by clouds. Guess what … the same happened this time! I had planned to go on Monday however the weather here was terrible (I only later found out that Laber had been above the clouds in lovely sunshine all day), so I delayed the activation by a day. Oberammegau is about 1hr and 15min from where I live, so not the closest of summits but a good one to try the small kit out on as it has limited space to set-up.
The Activation:
The trip down was uneventful except that it started to rain – something that would be a constant parrt of the day. The “Laberbahn” cable car, has only 4 cars on it and runs to a specific schedule, meaning that you can only ascend or descend every 30 minutes. As I was ahead of my planned schedule when I got to the lower station, I was not worried that I’d have to wait a while for the lift. As it happened I was the only person going up in this car and I took several photos – shown below – of the view from the lift. As it turned out this was a good idea as the journey back down later in the afternoon had 12 people packed into the car and for most of the 15 minutes trip, nothing could be seen through the windows as we were mostly in the clouds.
Once I got to the summit, I decided to get out and take a few more pictures and then set up the station, rather than sampling the delights of the restaurant. I expected there may be some issues with the set-up as I had not used this approach on a summit before, I thought it better to start, just at the point that the rain got heavier. In fact apart from a little tangling of the counterpoise wires, the set-up went together without any real issues. I started on 20m and the set the coil to the noted reading I had used in the house. When then checking the SWR from a little way below where I had the antenna, it was fine (this was not to be the case when I later went onto 40m where some adjustment was needed and the new value is now noted for the future). I checked to see if I could hear any of the recently spotted activators – I could not. The HF conditions over the last month have been the worst I have experienced since starting on HF about 4 years ago and it looked like today was going to be an extension of those propagation conditions. Undeterred I found 14.285 KHz free, and started calling CQ SOTA while typing in a spot through the rain globules on the front of the smart phone, After a couple of attempts, I managed to get the spot out and kept calling CQ SOTA. I was very happy to have Gomes from Portugal (CT1HIX) come back to me and give me a 5-1 report, he was then followed by Pedro EA2CKX with a 5-2 report. I then was amazed at the signal from Alexi RA1AVP/1 about 1850 kilometres away and gave me a 5-7 report. At this point I was happy, the antenna set-up was definitely working, but then came the best call of the day from Phil VE1WT in Nova Scotia, Canada at about 5500 kilometres and a 5-3 report. I am sure all four of these chasers have fantastic antennas and receivers, but the fact was that they were receiving me in some of the worst propagation conditions for years and that with my lightweight set-up.
As I had no more calls on 20m, I once again checked to see what other activators were on and switched to 40m to call Hajo DJ9MH who was up on Ebersberg DM/BM-115 after a couple of calls I git him and we booked an S2S for the day. After that I found 7.150MHz to be free and spotted myself there calling and managed a further eleven contacts. The activation stopped when the log book had got so wet that I could not write to it and I was feeling rather wet and cold but happy that everything had gone so well. So it only remained then to pack-up head into the restaurant for a hot Chocolate drink and then wait for the gondola to take me back down the mountain after a very successful day.
Photos:
Equipment:
Yaesu FT817ND.
RHM-8B loaded vertical whip.
Hama photographic tripod.
Thick plastic painters sheet
Log:

Conclusions:
The minimum configuration worked exceptionally well. Even with just 5w and a limited antenna in bad propagation conditions amazing things are possible on the HF amateur bands, if you can spot yourself.
73 ’til the next Summit!

You must be logged in to post a comment.